Installation
To install Precomposer, the following steps need to be taken:
- Create a copy of the Precomposer start template repository
- Configuration
- Start the GitHub workflow
- Register DNS names
1. Copying the Precomposer-Template-Repository
-
Navigate to the repository: epc-deployment-configurations (opens in a new tab).
-
Create a new repository using the template:
- Click the "Use this template" button (located at the top right, above the code).
- Select "Create a new Repository".
-
Choose a name and location for your new deployment repository:
- You can freely decide the name and location.
Important: If you choose a name other than
epc-deployment-configurations, you must update the service repositories (e.g., storefront) to reflect the new name. This ensures that the services' build pipelines can locate and trigger your deployment repository correctly. -
After the successful creation the next steps will be done in your own copy.
2. Configuration
To set up your newly created repository with GitHub Action variables and secrets. This is how you can add secrets and variables to your repository:
-
Navigate to:
Settings -> Secrets and Variables -> Actions. -
To create a GitHub Action Secret:
- Switch to the "Secrets" tab.
- Click the green button "New repository secret".
-
To create a GitHub Action Variable:
- Switch to the "Variables" tab.
- Click the green button "New repository variable".
Configuration for Cluster/Provider Access
Add the following as GitHub Action Secrets:
| Name | Required? | Default | Description |
|---|---|---|---|
PERSONAL_ACCESS_TOKEN | Yes | - | Token for accessing GitHub. Details below. |
K8S_CLUSTER_CONFIG | Yes | - | Kubernetes configuration for the target cluster. Details below. |
DO_ACCESS_TOKEN | Only for DigitalOcean | - | Token to retrieve the external IP of the DigitalOcean load balancer. |
AWS_ACCESS_KEY_ID | Only for AWS EKS | - | Access key ID for authenticating with the AWS EKS cluster. |
AWS_SECRET_ACCESS_KEY | Only for AWS EKS | - | Secret access key for authenticating with the AWS EKS cluster. |
Details about PERSONAL_ACCESS_TOKEN
How to create it:
- Go to
GitHub -> Profile photo -> Settings -> Developer settings -> Personal access tokens -> Generate new token. - Follow the instructions to generate a new token. More information can be found here (opens in a new tab).
- Ensure the token is created by the same user who has access to the newly copied Precomposer-Template-Repository.
Required permission scopes:
repo: For repository access.write:packages: For registry access.
Where it is used:
- Deploys a generated SSH key in your
deployment-configurationsrepository, allowing ArgoCD to access it. - Creates a
docker-pull-secretssecret in the Kubernetes cluster, enabling the cluster to fetch container images.
Details about K8S_CLUSTER_CONFIG
What it is:
- The Kubernetes cluster configuration file (commonly used as
$KUBECONFIGin the shell).
How to retrieve it:
- Run the following command to generate a minimal configuration:
kubectl config view --minify --flattenFor DigitalOcean clusters:
- Go to the cluster's overview page.
- Switch to the "Settings" tab.
- Click the blue "Actions" button (top right) and select "Download Config".
How to use it:
- Copy the entire content of the configuration file and paste it into the secret field when creating this GitHub Action Secret.
Details about DO_ACCESS_TOKEN
What it is:
- A token required for DigitalOcean clusters to determine the cluster's external IP address.
How to create it:
- Go to
DigitalOcean -> API (main navigation left side) -> Generate New Token. - Click the "Generate New Token" button (top right).
- Select both read and write scopes. More information can be found here (opens in a new tab).
Configuration of the Services
To configure the composable commerce services (e.g., Commercetools, Storyblok), you need to add the required secrets as GitHub Action Secrets. Follow the instructions below for each service and refer to the detailed explanations for additional context.
Adding Secrets
These secrets are prefixed with TO_K8S_ to indicate they are written directly to your Kubernetes cluster and are no longer relevant in GitHub after deployment.
You can add these secrets either:
- Manually via the GitHub UI: Navigate to
Settings -> Secrets and Variables -> Actions. - Using GitHub CLI: If you're familiar with the GitHub CLI, use the
github-secrets-example.txtfile in the root of your new repository. This file contains all required secrets and an example command to populate them into a GitHub repository.
Required GitHub Action Secrets
| Name | Required? | Default | Description |
|---|---|---|---|
TO_K8S_COMMERCETOOLS_AUTH_CLIENT_ID | Yes | - | The Auth-Client-ID from Commercetools. |
TO_K8S_COMMERCETOOLS_AUTH_CLIENT_SECRET | Yes | - | The Auth-Client-Secret from Commercetools. |
TO_K8S_COMMERCETOOLS_CLIENT_ID | Yes | - | The Client-ID from Commercetools. |
TO_K8S_COMMERCETOOLS_CLIENT_SECRET | Yes | - | The Client-Secret from Commercetools. |
TO_K8S_COMMERCETOOLS_CHECKOUT_APPLICATION_KEY | Yes** | - | The Checkout application key from Commercetools. |
TO_K8S_STORYBLOK_ACCESS_TOKEN | Yes | - | The Access-Token from Storyblok. |
STORYBLOK_MGMT_TOKEN | No | - | Management-Token for importing demo content into Storyblok. |
STORYBLOK_SPACE_ID | (Yes) | - | Space-ID for importing data into Storyblok. Created automatically if missing. |
TO_K8S_ALGOLIA_APPLICATION_ID | Yes* | - | The Application ID from Algolia. |
TO_K8S_ALGOLIA_SEARCH_KEY | Yes* | - | The Search-only API key from Algolia. |
TO_K8S_SENDGRID_API_KEY | Yes | - | The Admin API key from SendGrid. |
*Required when Algolia is used as the search provider for products.**Required when the Commercetools Checkout solution is used.
Details About the Secrets
Commercetools Credentials
Why Two API Clients? (TO_K8S_COMMERCETOOLS_AUTH_CLIENT_ID, TO_K8S_COMMERCETOOLS_CLIENT_ID)
- Auth API Client: Used for session-related tokens after user login. These tokens are scoped to view personal entities (e.g., carts, orders). When creating this client use the
Mobile & single-page application clienttemplate. - General API Client: Used for standard shop requests (e.g., product search, anonymous checkout). When creating this client use the
Admin clienttemplate.
How to Create API Clients
- Go to
Commercetools -> Settings -> Developer Settings. - Click "+ Create new API client".
- Configure the clients as per the required scopes.
Algolia Credentials
ALGOLIA_APPLICATION_ID: Found in the Algolia Dashboard under the Search tab (top left).ALGOLIA_SEARCH_KEY: A read-only API key for enabling search capabilities. Found inDashboard -> Settings -> API Keys.
SendGrid Credentials
SENDGRID_API_KEY: Full-access API key from your SendGrid account. Required for theepc-email-processorto interact with SendGrid templates.
Storyblok Credentials
STORYBLOK_MGMT_TOKEN: Management token only necessary for importing demo data. Generate it viaStoryblok -> My Account -> Account Settings -> Personal Access Token.STORYBLOK_SPACE_ID: Space ID for importing data. If missing, a default space is created (not recommended due to rate limits).TO_K8S_STORYBLOK_ACCESS_TOKEN: Access token for read-only operations. Generate it viaStoryblok Space -> Settings -> Access Tokens.
Additional GitHub Action Variables
| Name | Required? | Default | Description |
|---|---|---|---|
TO_K8S_COMMERCETOOLS_PROJECT_KEY | Yes | - | The Project-Key from Commercetools. |
TO_K8S_SEARCH_PROVIDER_TO_USE | No | - | Determines the search provider (algolia or commercetools). Defaults to commercetools. |
TO_K8S_CHECKOUT_TYPE | No | - | Determines the checkout type (precomposer or commercetools). Defaults to precomposer. |
TO_K8S_COMMERCETOOLS_AUTH_CLIENT_SCOPES | Optional | See below | Scopes for the Auth API Client. |
TO_K8S_COMMERCETOOLS_API_URL | Optional | https://api.europe-west1.gcp.commercetools.com/ | API URL for Commercetools. |
TO_K8S_COMMERCETOOLS_AUTH_URL | Optional | https://auth.europe-west1.gcp.commercetools.com/ | Auth URL for Commercetools. |
TO_K8S_COMMERCETOOLS_CHECKOUT_HOST | Optional | https://app.checkout.europe-west1.gcp.commercetools.com/ | Checkout URL for Commercetools. |
TO_K8S_COMMERCETOOLS_CHECKOUT_CALLBACK_URL | Yes** | - | URL to redirect users after a successful checkout. |
TO_K8S_ALGOLIA_INDEX | Yes* | - | Valid index name from your Algolia Dashboard. |
TO_K8S_SENDER_EMAIL_ADDRESS | Yes | - | Valid email address registered in SendGrid. |
Notes on Specific Variables
TO_K8S_COMMERCETOOLS_PROJECT_KEY: Found inCommercetools -> My Account -> Manage Projects.TO_K8S_SEARCH_PROVIDER_TO_USE: Specifies the search provider (algoliaorcommercetools). Defaults tocommercetoolsif unset.TO_K8S_CHECKOUT_TYPE: Specifies the checkout type (precomposerorcommercetools). Defaults toprecomposerif unset.TO_K8S_SENDER_EMAIL_ADDRESS: Must be a verified sender email in SendGrid.
Final Notes
- Ensure all the above secrets and variables are set at this point.
- For more details on configuring specific services, refer to their respective documentation.
3. Start the GitHub Workflow
From your repository, start the workflow "Install Precomposer on k8s cluster":
You can do this via Main menu of the project -> Actions -> (if necessary) close the GitHub introduction dialogue -> Install Precomposer on k8s cluster.
Input Parameters
The workflow accepts the following input parameters:
(How the DNS names are composed of the specified variable values is explained in the next section).
| Name | Required? | Default | Description |
|---|---|---|---|
DNS_BASE_DOMAIN | No | precomposer.shop | The base domain under which Precomposer should be reachable. |
DNS_DOMAIN_PREFIX | No | demo | Prefix before the base domain. |
PROJECT_ENVIRONMENT | No | test | Name of the environment to be created. Common names include test, dev, prod, etc. |
NS_PRECOMPOSER_BASENAME | No | ecube-precomposer | Base name for the namespace where the core of Precomposer will be installed. PROJECT_ENVIRONMENT will be appended (e.g., ecube-precomposer-test). |
LETSENCRYPT_EMAIL | No | hostmaster@ecube.de | Email address for registering the Let's Encrypt certificate. Leave default when using precomposer.shop as the base domain. Must be set when using another domain. |
CLUSTER_ENVIRONMENT | No | If installing to multiple clusters, specify the name of the GitHub environment where the cluster config secret is stored. | |
IMPORT_DATA_SOURCE | No | ecubegmbh/epc-data-importer | The organization and repository name where demo data is stored. If not empty, a new import workflow is triggered. |
Workflow Run
After submitting the parameters, GitHub will start the workflow. A new "workflow run" will appear after a few seconds.
-
To monitor progress: Go to
Actions -> Workflow Runs -> Click on the latest run.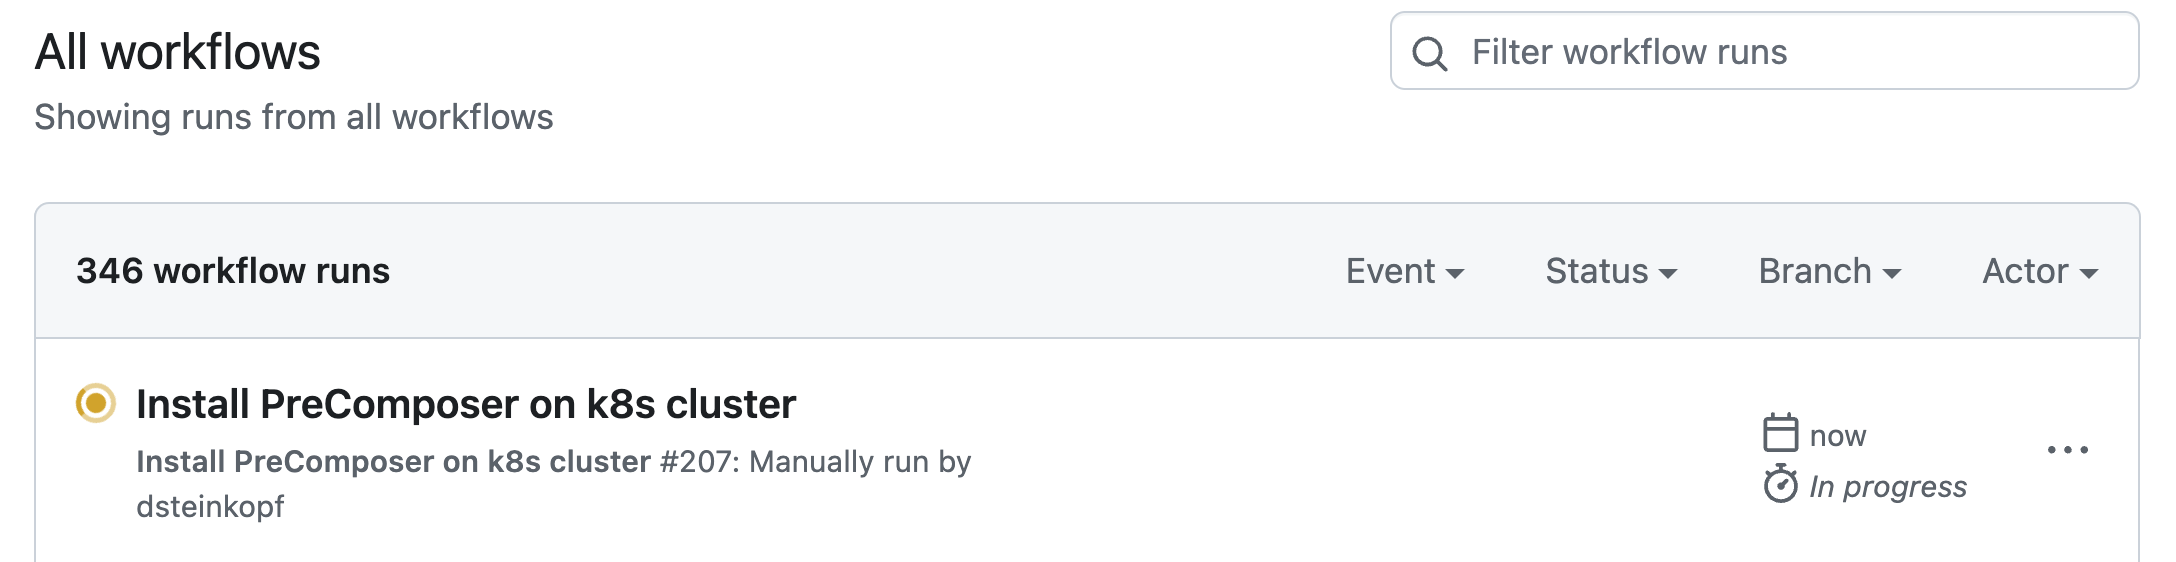
-
To view details: Go to
Workflow Summary -> Click on individual jobs.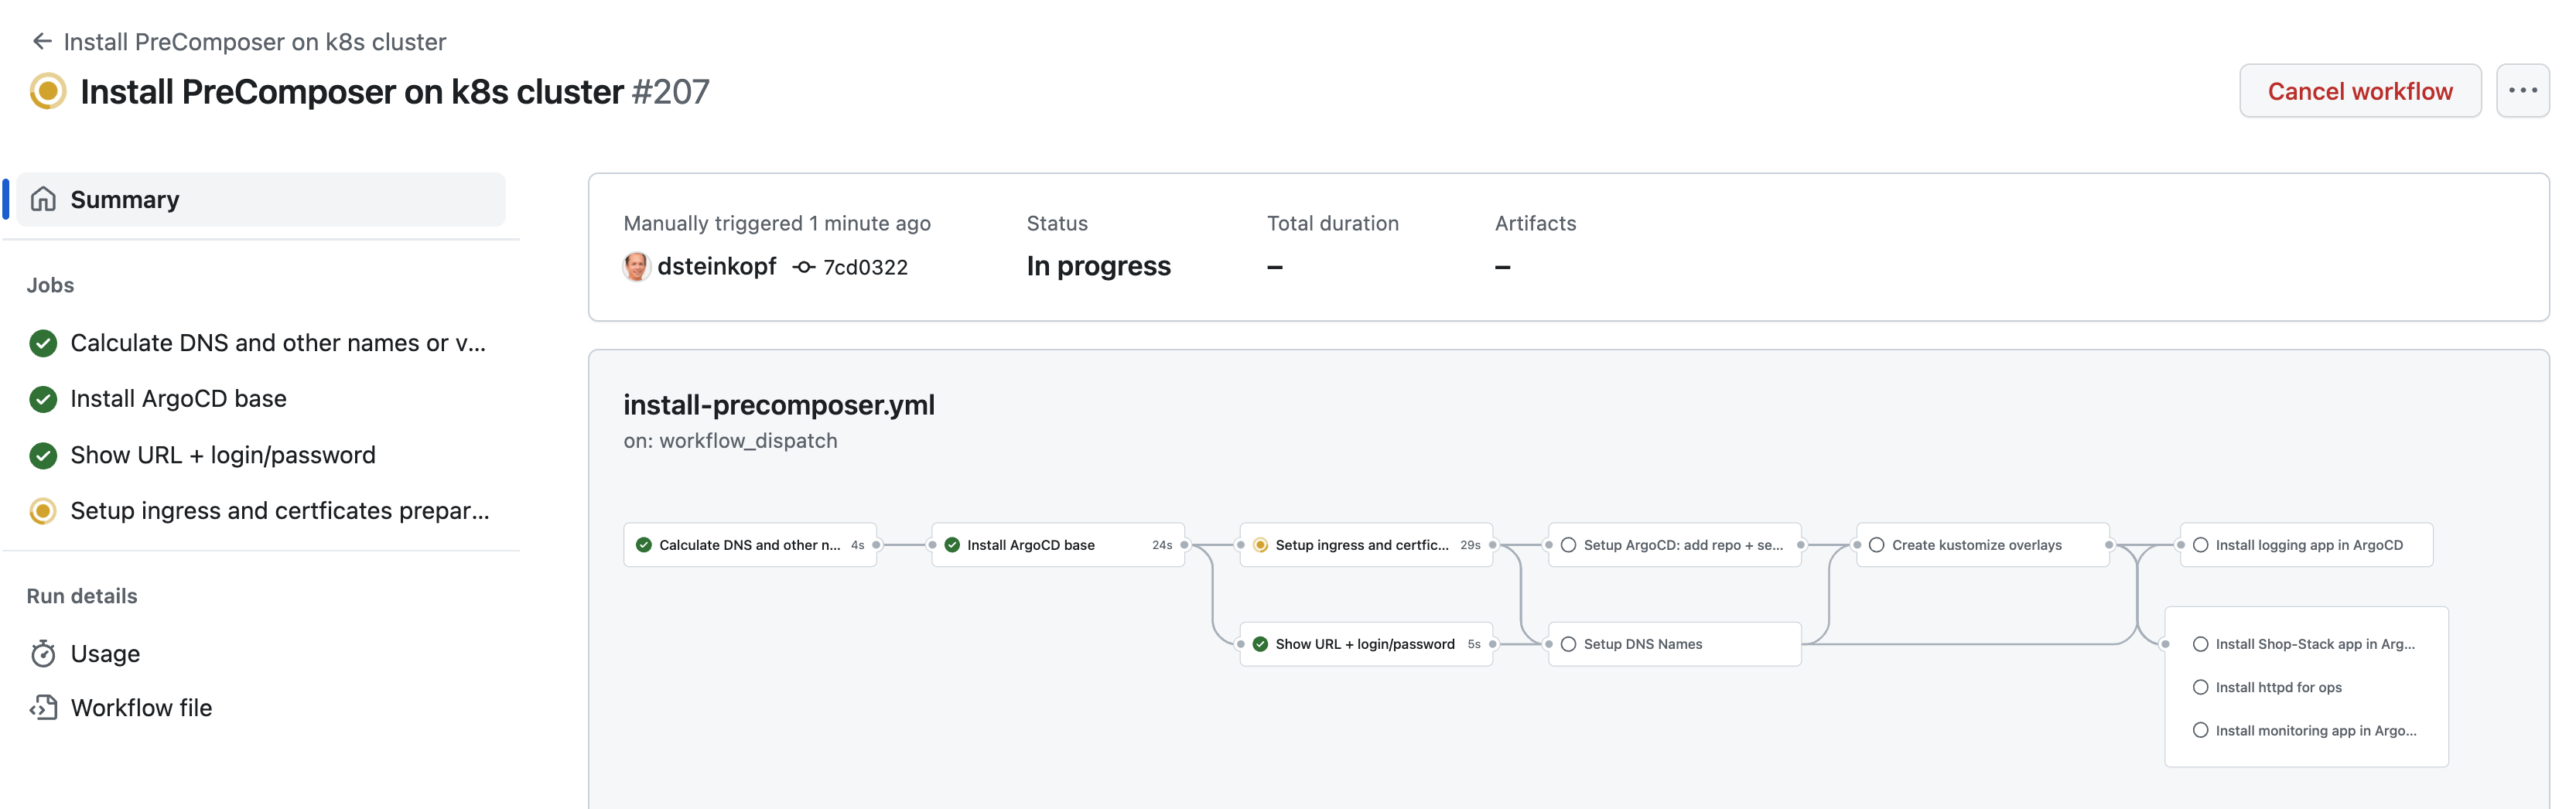

Notes
- The execution typically takes a few minutes. However, some steps (e.g., waiting for services to start or registering DNS names) may take longer.
- Ensure all input parameters are correctly configured before starting the workflow.
4. Register DNS Names
The DNS names must be registered in your DNS system.
-
If you specified
precomposer.shopas the base domain: This step is not necessary. The DNS names will be registered for you automatically. -
If you are using your own domain: You must manually set up the DNS names to point to the external IP (e.g., load balancer) of the Precomposer setup.
Finding the External IP
-
Locate the external IP:
You can get the IP via
Actions -> Workflow Runs -> !!! MANUAL ACTION HERE: Getting started -> Step: !!! MANUAL ACTION HERE: Getting started.- If the setup process successfully detects the external IP, it will be displayed in this step.
- If the external IP is not displayed, you will need to determine it manually using your cluster provider's tools.


Setting Up DNS Names
Once you have the external IP, you can (and should) set up the DNS names manually while the setup workflow is still running.
Note: DNS propagation and Let's Encrypt certificate registration can take time, so starting this process early is recommended.
- Ensure all DNS names point to the same external IP of your cluster (load balancer).
DNS Name Composition
The DNS names are composed as follows:
| System | DNS-Part 1 | DNS-Part 2 | DNS-Part 3 |
|---|---|---|---|
| Frontend | frontend-$DNS_PROJECT_ENV | .$DNS_DOMAIN_PREFIX | .$DNS_BASE_DOMAIN |
| eCommerce-Hub | api-$DNS_PROJECT_ENV | .$DNS_DOMAIN_PREFIX | .$DNS_BASE_DOMAIN |
| Infrastructure | ops | .$DNS_DOMAIN_PREFIX | .$DNS_BASE_DOMAIN |
Example
For the following input parameters:
DNS_BASE_DOMAIN:precomposer.shopDNS_DOMAIN_PREFIX:demoPROJECT_ENVIRONMENT:test
The resulting DNS names would be:
| System | DNS-Name |
|---|---|
| Frontend | frontend-test.demo.precomposer.shop |
| eCommerce-Hub | api-test.demo.precomposer.shop |
| Infrastructure | ops.demo.precomposer.shop |
Notes
- If you are not using
precomposer.shop, ensure the DNS names are set up correctly and point to the external IP before the workflow completes. - Use your cluster provider's tools to verify the external IP if it is not automatically detected.